Replacing Masonite Siding on a House
Replacing masonite siding on the house is a significant home improvement project that can dramatically enhance your home’s curb appeal and protect it from the elements. This guide walks you through the entire process, from understanding the limitations of masonite siding to selecting the perfect replacement material and completing the installation. We’ll cover everything you need to know to successfully tackle this project, whether you’re a seasoned DIYer or hiring a contractor.
We’ll explore various siding options, detailing their pros and cons, costs, and maintenance requirements. You’ll learn how to properly prepare your home, safely remove the old siding, and install the new siding correctly to ensure a long-lasting, beautiful result. We’ll also delve into budgeting, permitting, and addressing potential post-installation issues, providing a comprehensive understanding of this renovation project.
Understanding Masonite Siding

Source: odysseycontracting.com
Masonite siding, a popular exterior cladding choice for many years, offers a relatively affordable and easy-to-install alternative to other materials. However, understanding its characteristics and limitations is crucial for homeowners considering its use or replacement. This section will delve into the composition, lifespan, common problems, and reasons for the replacement of masonite siding.
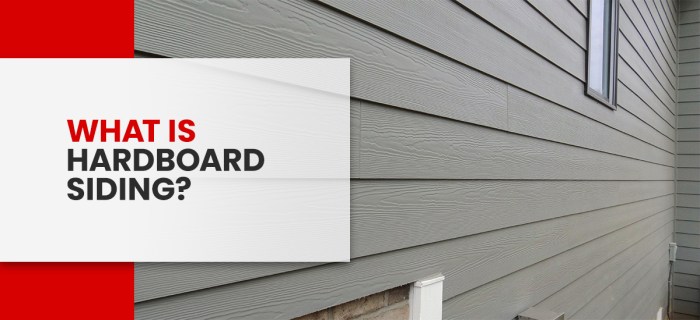
Masonite siding is a type of hardboard siding made from wood fibers that are compressed and bonded together with resins and waxes. This process creates a relatively durable and weather-resistant material, but it’s not as robust as some other siding options. Its composition makes it susceptible to moisture damage, which is a major factor affecting its lifespan.
Masonite Siding Composition and Lifespan
Masonite siding’s composition, primarily wood fibers, and binding agents, directly impacts its longevity. While properly installed and maintained masonite siding can last 20-30 years, factors like climate, exposure to sunlight, and maintenance practices significantly influence its actual lifespan. Harsh weather conditions, particularly prolonged exposure to moisture and extreme temperature fluctuations can accelerate degradation. Neglecting regular cleaning and maintenance will also shorten its lifespan considerably. For example, a house in a coastal region with high humidity and frequent storms might see its masonite siding deteriorate faster than one in a dry, inland climate.
Reasons for Masonite Siding Replacement
Homeowners choose to replace masonite siding for a variety of reasons. Often, it’s due to the natural aging process and the resulting damage. The cost of repairs can outweigh the cost of replacement, especially when extensive damage has occurred. Additionally, homeowners may opt for a replacement to improve their home’s curb appeal, and energy efficiency, or to switch to more durable and low-maintenance siding material. A desire for updated aesthetics, aligning with current design trends, is another compelling reason. Finally, the need to address underlying moisture issues, often discovered during inspection, might necessitate a complete siding replacement.
Signs Indicating Masonite Siding Needs Replacement
Several visible signs indicate that masonite siding is nearing the end of its lifespan and needs replacing. These include significant discoloration, warping, or swelling of the panels, which are often caused by moisture penetration. Cracks, chips, and holes in the siding are also clear indicators of damage. The presence of mold or mildew, particularly in shaded areas, points to persistent moisture problems. Finally, if the siding is consistently absorbing water, becoming soft or spongy to the touch, replacement is strongly recommended. Ignoring these signs can lead to more extensive and costly damage to the underlying structure of the home.
Choosing Replacement Materials
Replacing masonite siding presents an opportunity to upgrade your home’s exterior with a more durable and aesthetically pleasing material. Several options exist, each with its own set of advantages and disadvantages. Careful consideration of factors like cost, maintenance requirements, and desired aesthetics will guide you to the best choice for your needs and budget.
Siding Material Comparison
The following table compares four popular siding materials suitable for replacing masonite: vinyl, fiber cement, wood, and engineered wood. These materials vary significantly in cost, longevity, and maintenance needs. Choosing the right one depends on your priorities and budget.
| Material | Cost | Durability | Maintenance | Aesthetic Appeal |
|---|---|---|---|---|
| Vinyl | Low to Moderate | Moderate to High (depending on quality) | Low | Wide variety of colors and styles; can mimic other materials |
| Fiber Cement | Moderate to High | High | Moderate | Versatile; can be painted and textured to achieve various looks |
| Wood | Moderate to High | Moderate (requires regular maintenance) | High | Classic, natural look; many species and finishes available |
| Engineered Wood | Moderate | Moderate to High (depending on quality and composition) | Moderate | Variety of styles and finishes; often more resistant to warping than solid wood |
Pros and Cons of Siding Materials
Each siding material offers unique advantages and disadvantages regarding longevity, weather resistance, and insulation value. Understanding these factors is crucial for making an informed decision.
Vinyl Siding: Vinyl is known for its affordability and low maintenance. It’s resistant to rot, insect infestation, and moisture damage. However, it can be susceptible to damage from impact and extreme temperatures, and its lifespan is generally shorter than fiber cement or high-quality wood. It also offers limited insulation value compared to other options. Styles range from simple clapboard to more elaborate designs mimicking wood shakes or stone. Color options are extremely varied.
Fiber Cement Siding: Fiber cement siding boasts superior durability and weather resistance. It’s fire-resistant, virtually impervious to insect damage, and highly resistant to rot. While more expensive than vinyl, its longer lifespan and lower maintenance needs can offset the initial cost. Its insulation value is moderate. It can be painted to match any color scheme and textured to resemble wood, stucco, or other materials. It’s available in various profiles, including lap siding, board and batten, and shingles.
Wood Siding: Wood siding offers a classic, natural aesthetic. However, it requires significant maintenance to prevent rot, insect damage, and fading. Its longevity depends heavily on the type of wood used, the quality of the finish, and the climate. Proper sealing and regular painting or staining are essential. Insulation value varies by wood type and thickness. Wood siding offers a wide range of styles, from traditional clapboard to more rustic shiplap or shingle designs. Color options are vast due to the potential for staining and painting.
Engineered Wood Siding: Engineered wood siding combines the aesthetic appeal of wood with enhanced durability and resistance to moisture damage. It typically consists of wood fibers bonded with resins or other materials. Its lifespan and maintenance requirements fall between vinyl and solid wood. The insulation value is generally better than vinyl but less than fiber cement. It offers a range of styles and finishes, mimicking the look of various wood species. Color choices are available through paint or pre-finished options.
Pre-Replacement Preparation: Replacing Masonite Siding On A House
Source: northfaceconstruction.com
Replacing your masonite siding is a significant undertaking, but thorough preparation will ensure a smooth and efficient process. This phase involves securing necessary permissions, safely removing the old siding, and assessing the underlying structure for any needed repairs. Careful attention to detail now will save time and money later.
Before you even touch a single nail, you need to address the legal and logistical aspects of the project. This involves obtaining the necessary permits and scheduling inspections. Failure to do so can result in costly fines and delays.
Permitting and Inspections
Securing the necessary permits is crucial. Contact your local building department to determine the specific permits required for your project. This typically includes a building permit, which may necessitate submitting plans outlining the scope of work. The requirements will vary depending on your location and the extent of the siding replacement. Expect inspections at various stages of the project, including after the old siding is removed and before the new siding is installed. These inspections ensure your work meets local building codes and safety standards. Scheduling these inspections well in advance is vital to avoid project delays. For example, in many municipalities, a final inspection is required before the project is considered complete and the permit is closed.
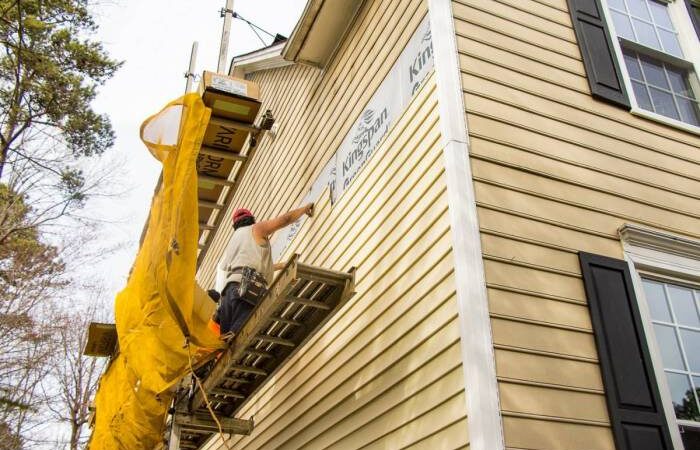
Removing Existing Masonite Siding, Replacing masonite siding on a house
Removing masonite siding requires careful attention to safety and proper waste disposal. Always wear appropriate personal protective equipment (PPE), including safety glasses, gloves, and a dust mask. Masonite can contain asbestos in older homes; if you suspect this, immediately contact a qualified asbestos abatement professional. Do not attempt to remove it yourself. For newer masonite, begin by carefully removing the siding from the top down, using a pry bar to gently lift and detach the panels. Work in small sections, avoiding excessive force to prevent damage to the underlying sheathing. As you remove each panel, carefully place it in designated waste disposal containers.
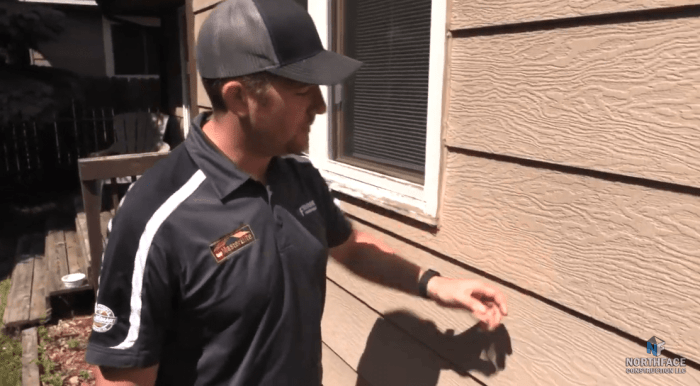
Assessing and Repairing Underlying Sheathing and Framing
Once the masonite siding is removed, thoroughly inspect the underlying sheathing and framing for any damage. Look for signs of rot, water damage, insect infestation, or loose or damaged boards. Repair any damaged areas by replacing rotted wood with new, pressure-treated lumber. Secure loose boards with appropriate fasteners. Addressing these issues before installing the new siding is critical to prevent future problems and ensure the longevity of your new siding. For example, replacing a small section of rotted sheathing is far less costly and time-consuming than dealing with widespread water damage caused by neglecting the issue. Properly repairing the underlying structure is essential for a structurally sound and long-lasting siding installation.
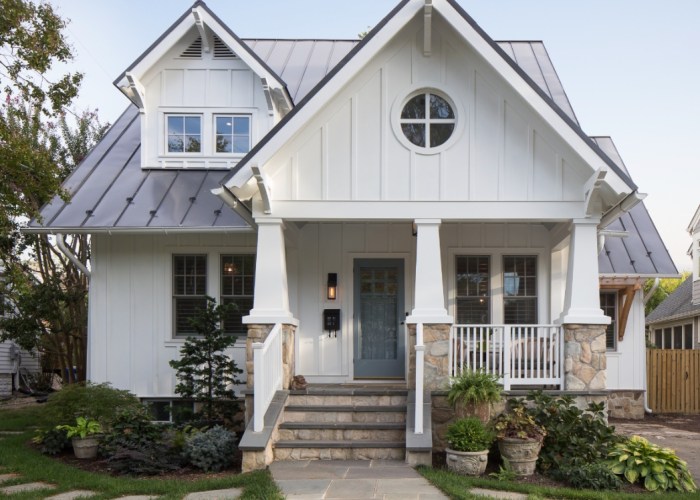
Installation Process
Source: homedit.com
Replacing your masonite siding is a significant undertaking, but with careful planning and execution, you can achieve a beautiful and long-lasting result. This section details the step-by-step installation process, offering guidance for various siding materials. Remember to always consult the manufacturer’s instructions for your specific product.
The installation process will vary slightly depending on the type of replacement siding you’ve chosen (vinyl, fiber cement, etc.), but the fundamental principles remain the same: proper preparation, careful measurement, and secure fastening are crucial for a successful installation.
Installing New Siding
The following steps provide a general guideline for installing new siding. Adapt these steps based on your chosen material’s specific instructions.
- Prepare the Walls: Ensure the existing masonite siding is completely removed, down to the sheathing. Repair any damaged sheathing, ensuring a smooth, even surface. Clean the area thoroughly to remove debris and loose particles.
- Install Housewrap (if necessary): If your climate requires it, install a house wrap over the sheathing to provide an additional layer of weather protection. Overlap the seams according to the manufacturer’s instructions and tape securely.
- Install Starter Strip: Begin at the bottom of the wall and install a starter strip, providing a level base for the first row of siding. This strip should be level and straight, ensuring a neat finished look.
- Install First Row of Siding: Carefully align and fasten the first row of siding to the starter strip, using appropriate fasteners. Ensure proper spacing and alignment. The method of fastening will depend on the siding material – nails, screws, or clips are common choices.
- Install Subsequent Rows: Continue installing rows of siding, overlapping each row according to the manufacturer’s specifications. Maintain consistent spacing and alignment throughout the installation process. Use a level to check alignment frequently.
- Cut and Fit Around Obstructions: Carefully measure and cut siding panels to fit around windows, doors, and other obstructions. Use appropriate tools for clean, precise cuts.
- Install J-Channel and Trim: Install J-channel around windows and doors to provide a neat finish and protect the edges of the siding. Add trim pieces to complete the aesthetic look.
- Install Finishing Pieces: Install corner trim, soffit, and fascia as needed to complete the installation. These pieces provide a clean and professional finish.
- Caulk and Seal: Caulk all seams and joints to prevent water penetration. Use a high-quality exterior-grade caulk designed for siding applications.
Flashing and Trim Installation Around Windows and Doors
Proper flashing and trim installation is crucial for preventing water damage. The following description illustrates a typical installation.
Imagine a window surrounded by a frame. First, a flashing is installed, extending up the sides and over the top of the window frame, creating a water-shedding barrier. This flashing, typically made of aluminum or galvanized steel, is tucked under the siding above the window and extends beyond the window frame on all sides. The siding is then installed, overlapping the flashing. Trim pieces, usually made of vinyl or wood, are then added over the flashing and siding, providing a neat, finished appearance and further protection against water intrusion. The same principle applies to doors, ensuring a continuous, waterproof seal around the opening.
Ventilation and Moisture Control
Proper ventilation and moisture control are essential for preventing mold, mildew, and rot. During installation, ensure adequate ventilation behind the siding to allow air circulation and moisture escape. This can be achieved through the use of vented soffits and ridge vents. Pay close attention to sealing all gaps and joints to prevent moisture from entering the wall system. Consider using a vapor barrier behind the siding if your climate requires it, but always follow e manufacturer’s recommendations for proper installation to avoid trapping moisture.
Post-Installation Care and Maintenance
Proper care and maintenance of your new siding are crucial for maximizing its lifespan and preserving its aesthetic appeal. Regular cleaning and timely attention to potential problems will prevent costly repairs down the line and ensure your home maintains its curb appeal for years to come. Different siding materials require slightly different care routines, so understanding your specific siding type is paramount.
Regular maintenance involves more than just occasional cleaning; it’s about proactive protection against the elements and potential damage. This includes inspecting for loose or damaged panels, addressing any minor issues promptly, and protecting your siding from harsh weather conditions. Failing to do so can lead to more significant problems such as water damage, rot, and pest infestations, ultimately requiring extensive and expensive repairs.
Cleaning and Protecting Different Siding Types
Different siding materials respond differently to cleaning agents and require varying levels of protection. For instance, vinyl siding is generally low-maintenance and can be cleaned with a simple solution of mild detergent and water. However, using abrasive cleaners or high-pressure washers can damage the surface. Fiber cement siding, on the other hand, is more durable but still requires careful cleaning to prevent staining. Avoid harsh chemicals that could dull the finish or cause discoloration. A soft brush and a gentle cleaning solution are recommended. For both types, regular rinsing with a garden hose is sufficient for removing loose dirt and debris. Consider applying a sealant specifically designed for your siding type to provide additional protection against UV damage and moisture. This preventative measure can significantly extend the lifespan of your siding.
Addressing Potential Post-Installation Problems
While proper installation minimizes the risk of problems, some issues may still arise. For example, minor gaps may appear between panels due to temperature fluctuations. These can usually be addressed with caulk designed for exterior use, ensuring a watertight seal. Another potential problem is the appearance of mildew or mold, especially in humid climates. This can be prevented with regular cleaning and the application of a mildewcide. If you notice significant damage, such as cracked or broken panels, contact a professional siding contractor for repair or replacement. Prompt attention to these issues will prevent minor problems from escalating into larger, more expensive repairs. For example, ignoring a small leak can lead to water damage to the underlying structure of your home, resulting in extensive and costly repairs.
Long-Term Maintenance Schedule
Establishing a regular maintenance schedule is essential. A twice-yearly inspection—once in spring and once in fall—allows for early detection and prevention of potential problems. During these inspections, check for loose panels, signs of damage, and any accumulation of debris. Clean the siding as needed, and address any minor issues promptly. This proactive approach will help preserve the beauty and integrity of your new siding for many years. A simple checklist can help ensure thorough inspections. Consider creating a log to track maintenance activities and note any repairs made. This record will be invaluable in future years.
Cost Considerations
Replacing masonite siding is a significant home improvement project, and understanding the associated costs is crucial for proper budgeting and planning. This section breaks down the various expenses involved, helping you create a realistic budget for your project. Remember that these are estimates, and your actual costs may vary depending on several factors.
Cost Breakdown
The total cost of replacing masonite siding typically involves three main components: materials, labor, and permits. The following table provides a general cost breakdown, but it’s essential to get personalized quotes from contractors in your area for accurate pricing.
| Cost Category | Cost per Square Foot (Estimate) | Total Cost (Example: 1500 sq ft house) | Notes |
|---|---|---|---|
| Materials (Siding, Trim, Fasteners) | $3 – $15 | $4,500 – $22,500 | Cost varies greatly depending on the chosen material (e.g., vinyl, fiber cement, wood). Higher-end materials will significantly increase the cost. |
| Labor | $3 – $10 | $4,500 – $15,000 | Labor costs depend on the complexity of the job, the size of the house, and regional labor rates. Experienced and reputable contractors will generally charge more. |
| Permits | $100 – $500+ | $100 – $500+ | Permit costs vary widely depending on local regulations and the size of the project. Always check with your local building department for specific requirements and fees. |
| Total Estimated Cost | $6 – $30+ | $9,100 – $42,500+ | This is a broad range. Actual costs can be higher or lower depending on the factors discussed below. |
Factors Influencing Total Cost
Several factors can significantly influence the overall cost of your siding replacement project. Understanding these factors will help you create a more accurate budget and avoid unexpected expenses.
The size of your house is a primary determinant. Larger houses naturally require more materials and labor, resulting in higher costs. For example, a 2000-square-foot house will cost considerably more than a 1000-square-foot house.
The chosen replacement material plays a substantial role. Vinyl siding is generally the most affordable option, while fiber cement and wood siding are significantly more expensive. The durability, aesthetic appeal, and maintenance requirements of each material should be considered when making your selection. For instance, a house with intricate detailing will require more labor and materials, pushing the cost higher.
Regional labor rates also affect the overall cost. Labor costs vary widely across different geographic locations, with some areas having significantly higher labor rates than others. Contractors in high-demand areas or those with specialized skills often charge more.
Creating a Realistic Budget
Creating a realistic budget requires careful planning and research. Start by obtaining multiple quotes from reputable contractors in your area. These quotes should detail the materials being used, the labor costs, and any additional fees. Compare the quotes carefully, paying attention to the details and the contractor’s experience and reputation.
Include a contingency fund in your budget. Unexpected issues can arise during any home renovation project. A contingency fund of 10-20% of the total estimated cost can help cover unforeseen expenses and prevent budget overruns. For example, if your estimated cost is $15,000, allocate an additional $1,500 – $3,000 as a contingency.
Finally, factor in the cost of any necessary repairs or other work that may be discovered during the siding removal process. This could include underlying sheathing repair, window or trim replacement, or other unforeseen issues. Incorporating these potential costs into your budget will prevent financial surprises during the project.
Final Conclusion
Source: theroofdocs.com
Replacing your masonite siding is a worthwhile investment that can significantly increase your home’s value and improve its energy efficiency. By carefully considering the factors Artikel in this guide – from material selection and proper installation to ongoing maintenance – you can ensure a successful project that leaves your home looking its best for years to come. Remember to always prioritize safety and consider seeking professional assistance when needed. With careful planning and execution, you can transform your home’s exterior and enjoy the results for many years.
Quick FAQs
Can I replace the masonite siding myself?
While possible for smaller areas, replacing siding on an entire house is a demanding task. Consider your DIY skills and the size of your home before attempting it. Professional installation is often recommended for larger projects.
How long does it take to replace masonite siding?
The timeframe varies greatly depending on the house size, chosen material, and weather conditions. Expect several days to several weeks for a complete replacement.
What’s the best time of year to replace siding?
Spring and fall are generally ideal, offering moderate temperatures and less rain than summer or winter. Avoid extreme heat or freezing temperatures.
What should I do with the old masonite siding?
Check with your local waste management facility for disposal options. Some areas have specific requirements for disposing of construction debris.
How can I find a reputable siding contractor?
Get recommendations from friends and family. Check online reviews and verify licensing and insurance. Request multiple bids before making a decision.
Comments are closed.