Replacing Clapboard Siding A Comprehensive Guide
Replacing clapboard siding is a significant home improvement project that can dramatically enhance your home’s curb appeal and protect it from the elements. This guide walks you through every step, from choosing the right materials and budgeting for the project to selecting a contractor and maintaining your new siding for years to come. We’ll explore various siding options, detail the replacement process, and offer tips for a successful renovation.
Whether you’re a seasoned DIYer or relying on professional help, understanding the intricacies of replacing clapboard siding is crucial for a smooth and satisfying outcome. This guide aims to provide you with the knowledge and confidence to tackle this transformative project effectively.
Types of Clapboard Siding Replacement Materials
Choosing the right replacement material for your clapboard siding is a crucial decision impacting your home’s aesthetics, durability, and long-term cost. Several options exist, each with its own set of advantages and disadvantages. Understanding these differences will help you make an informed choice that best suits your needs and budget.
Clapboard Siding Material Comparison
The following table compares common clapboard siding materials based on cost, durability, and maintenance requirements. Remember that prices can vary significantly depending on location, supplier, and specific product features. Durability and maintenance needs also depend on factors such as climate and proper installation.
| Material | Cost (Relative) | Durability | Maintenance |
|---|---|---|---|
| Vinyl | Low | High (resistant to rot, insects, and moisture) | Low (occasional cleaning) |
| Fiber Cement | Medium-High | Very High (fire-resistant, durable, and long-lasting) | Medium (periodic painting or staining) |
| Wood | Medium-High | Medium (susceptible to rot, insects, and moisture; requires regular maintenance) | High (regular painting, staining, and potential repairs) |
| Engineered Wood | Medium | High (more resistant to rot and insects than natural wood) | Medium (periodic painting or staining) |
Vinyl Clapboard Siding
Vinyl siding offers a budget-friendly option with good durability. It’s resistant to rot, insects, and moisture, requiring minimal maintenance beyond occasional cleaning. However, it can be susceptible to damage from impact and extreme temperatures, and it doesn’t offer the same aesthetic appeal as natural wood. Its color may fade over time in harsh sunlight.
Fiber Cement Clapboard Siding
Fiber cement siding provides exceptional durability and fire resistance. It’s a long-lasting choice that can withstand harsh weather conditions. While more expensive than vinyl, its longevity and low maintenance needs can offset the higher initial cost over time. However, it’s heavier than vinyl and requires professional installation. It also requires periodic painting or staining to maintain its appearance.
Wood Clapboard Siding
Natural wood siding offers a classic, timeless aesthetic. However, it requires significant maintenance, including regular painting or staining to protect it from rot, insects, and moisture damage. Wood is also susceptible to warping, cracking, and fading over time. Despite the higher maintenance, many homeowners appreciate the natural beauty and character of wood siding.
Engineered Wood Clapboard Siding
Engineered wood siding combines the aesthetic appeal of natural wood with enhanced durability and resistance to rot and insects. It’s typically made from wood fibers and resins, creating a more stable and less maintenance-intensive product than solid wood. While more expensive than vinyl, it’s generally less costly and requires less maintenance than natural wood siding. However, it may not have the same level of character and natural variation as solid wood.
Aesthetic Differences in Clapboard Siding
The aesthetic differences between these materials are significant. Vinyl siding often comes in a limited range of colors and textures, mimicking the look of wood but lacking its natural variation. Fiber cement siding can be textured to resemble wood or stone, offering a more natural appearance. Wood siding provides a unique, natural look with variations in grain and color, offering a rustic or elegant feel depending on the wood type and finish. Engineered wood siding aims to replicate the look of natural wood but with more consistent color and texture. The choice depends on the desired style and level of natural variation.
Cost Estimation and Budgeting for Replacement
Replacing clapboard siding is a significant home improvement project, and accurate cost estimation is crucial for successful budgeting and project management. Understanding the various cost components and factors influencing the final price will help you make informed decisions and avoid unexpected expenses. This section will guide you through creating a realistic budget and obtaining accurate estimates from contractors.
Sample Budget Breakdown for Clapboard Siding Replacement, Replacing clapboard siding
A comprehensive budget should account for material costs, labor costs, and permits. The following is a sample breakdown for a typical 11,500-square-foothouse, but remember that these are estimates and actual costs can vary significantly based on several factors discussed later.
| Cost Category | Estimated Cost | Notes |
|---|---|---|
| Materials (Siding, Trim, Fasteners, Underlayment) | $5,000 – $15,000 | Cost varies greatly depending on material choice (e.g., cedar, vinyl, fiber cement). Higher-end materials will significantly increase costs. |
| Labor | $8,000 – $15,000 | Labor costs depend on the complexity of the project, the size of the house, and the contractor’s hourly rate. |
| Permits and Inspections | $500 – $1,500 | Permit costs vary by location and the scope of the project. |
| Waste Removal | $200 – $500 | Proper disposal of old siding and construction debris is essential. |
| Contingency (Unexpected Costs) | $1,000 – $2,000 | It’s crucial to include a contingency for unforeseen issues, such as rotted wood requiring additional repairs. |
| Total Estimated Cost | $14,700 – $34,000 | This is a broad range. Actual costs will vary greatly. |
Factors Influencing the Overall Cost of Clapboard Siding Replacement
Several factors significantly impact the final cost of a clapboard siding replacement project. Understanding these factors will allow for more accurate budgeting and realistic expectations.
- House Size and Complexity: Larger houses and those with complex architectural details will naturally require more materials and labor, increasing the overall cost.
- Material Selection: The type of siding chosen (e.g., cedar, vinyl, fiber cement) drastically affects the cost. Cedar is generally the most expensive, followed by fiber cement, with vinyl being the most budget-friendly option.
- Labor Rates: Contractor labor rates vary by location and experience. Experienced and highly rated contractors often charge more per hour.
- Existing Siding Condition: If the existing siding is severely damaged or rotten, additional time and materials may be needed for repairs and removal, leading to higher costs.
- Permits and Inspections: Permitting costs and inspection fees can vary depending on local regulations and the project’s complexity.
- Waste Removal Costs: Proper disposal of old siding and construction debris adds to the overall cost.
- Geographic Location: Labor and material costs can vary significantly based on geographic location.
Obtaining Accurate Cost Estimates from Contractors
Getting multiple accurate cost estimates from reputable contractors is essential for informed decision-making.
- Clearly Define the Scope of Work: Provide contractors with detailed specifications of your project, including the type of siding, desired colors, and any additional work required (e.g., repairs, window trim replacement).
- Request Detailed Written Estimates: Don’t rely on verbal estimates. Insist on detailed written proposals outlining all costs, including materials, labor, permits, and a contingency.
- Compare Estimates Carefully: Review the estimates thoroughly, comparing the materials, labor costs, and overall pricing. Be wary of unusually low bids, which may indicate corners being cut.
- Verify Contractor Licensing and Insurance: Ensure the contractor is properly licensed and insured to protect yourself from potential liability issues.
- Check References and Reviews: Before hiring a contractor, check their references and online reviews to gauge their reputation and quality of work.
- Ask Clarifying Questions: Don’t hesitate to ask the contractor questions about their process, materials, and timeline to ensure you understand everything before signing a contract.
The Replacement Process
Replacing clapboard siding is a significant undertaking, requiring careful planning and execution. This section details the steps involved, from preparation to final installation, ensuring a smooth and successful project. Remember to always prioritize safety and follow all manufacturer instructions for materials used.
Necessary Tools and Equipment
A comprehensive set of tools is crucial for efficient and safe siding replacement. Having everything readily available will minimize interruptions and improve workflow. Improper tools can lead to damage or injury.
- Measuring tape and level
- Hammer and pry bar
- Circular saw and reciprocating saw
- Safety glasses and work gloves
- Ladder (appropriate height for your home)
- Nail gun (optional, but significantly speeds up the process)
- Caulk gun and exterior-grade caulk
- Safety harness and fall protection equipment (for working at heights)
- Putty knife and scraper
- Various sizes of screws and nails appropriate for the new siding
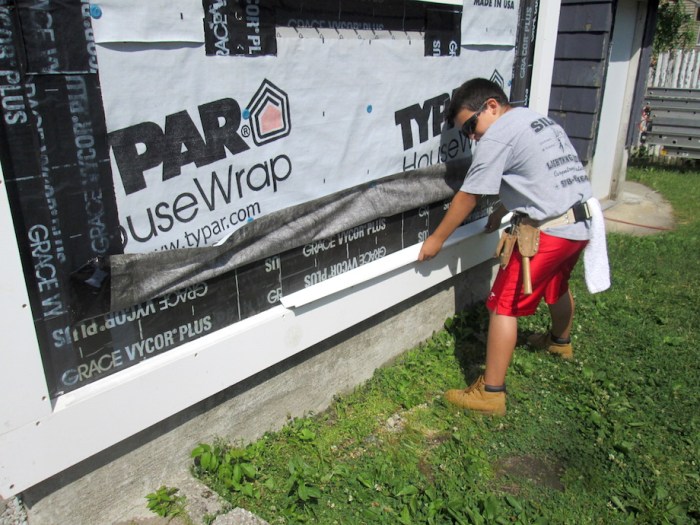
Preparing the House for Siding Replacement
Thorough preparation is essential for a successful siding replacement. This phase involves removing the old siding and assessing the underlying structure for any necessary repairs. Neglecting this step can compromise the longevity and aesthetic appeal of the new siding.
- Inspecting the existing siding: Begin by carefully inspecting the existing clapboard siding for damage, rot, or insect infestation. Note any areas requiring extra attention during removal.
- Removing the old siding: Start at the bottom of the house and carefully remove the clapboards, using a pry bar to loosen them. Work your way up, removing nails and discarding the old siding responsibly. Be cautious not to damage the underlying sheathing.
- Inspecting and repairing the sheathing: Once the old siding is removed, thoroughly inspect the underlying sheathing (typically plywood or OSB). Repair or replace any damaged or rotted sections. Ensure the sheathing is structurally sound and level.
- Installing new sheathing (if necessary): If significant damage is found, replace sections of sheathing with new material. Ensure proper fastening and alignment.
- Installing house wrap (if necessary): House wrap provides an additional layer of protection against moisture. If the existing house wrap is damaged or missing, install new house wrap, overlapping seams, andsecureg it with staples.
- Installing flashing (if necessary): Flashing is crucial around windows, doors, and other openings to prevent water intrusion. Replace any damaged or missing flashing with new material.
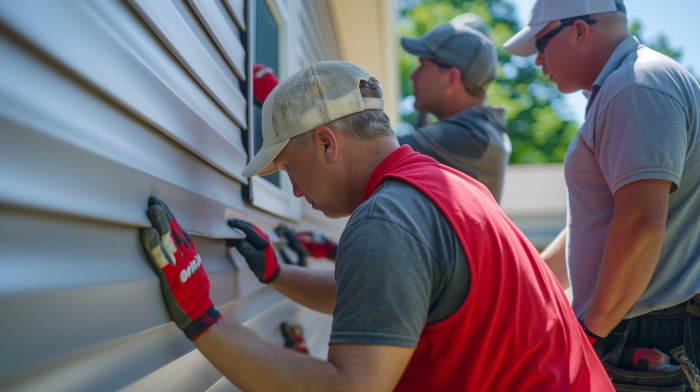
Step-by-Step Siding Replacement
This section Illustrates the sequential steps for installing the new clapboard siding. Following these steps precisely will ensure a professional-looking and durable finish.
- Installing starter strips: Begin by installing starter strips at the bottom of the wall. These provide a level base for the first row of siding.
- Installing the first row of siding: Install the first row of siding, aligning it with the starter strip and ensuring proper spacing. Secure with nails or screws, following manufacturer recommendations.
- Installing subsequent rows: Continue installing rows of siding, overlapping each row according to manufacturer specifications. Maintain consistent spacing and alignment throughout the process.
- Cutting and fitting around windows and doors: Carefully measure and cut the siding to fit around windows and doors. Ensure proper sealing and flashing to prevent water damage.
- Installing corner boards and trim: Install corner boards and trim pieces to finish the corners and edges of the siding. These pieces provide a clean and professional look.
- Caulking: Apply exterior-grade caulk to seal all joints and seams to prevent water intrusion. This is crucial for the longevity of the new siding.
Choosing and Working with Contractors
Source: ctfassets.net
Replacing your clapboard siding is a significant investment, and choosing the right contractor is crucial for a successful project. Selecting a qualified and reputable contractor ensures quality workmanship, adherence to timelines, and protection against potential problems. This section will guide you through the process of finding and working with the best contractor for your needs.
Finding reputable and qualified contractors requires diligent research and careful vetting. Don’t rely solely on online advertisements; actively seek out recommendations from trusted sources like friends, family, and neighbors who have recently undertaken similar home improvement projects. Checking online review platforms can provide additional insights, but remember to consider the overall pattern of reviews rather than focusing on individual, potentially biased, comments. Look for contractors with proven experience in clapboard siding replacement, ideally with a portfolio showcasing their previous work. Confirm they are properly licensed and insured, which protects you from liability in case of accidents or disputes.
Contractor Selection Criteria
Several key factors should guide your contractor selection. Verifying licensing and insurance is paramount. Request proof of their licenses and insurance policies; this demonstrates their commitment to professional standards and protects you from potential financial liabilities. Next, assess their experience. Inquire about the number of similar projects they’ve completed and request references. Contacting these references allows you to gauge the contractor’s reliability, communication skills, and the quality of their work firsthand. Finally, examine their communication style. A responsive and transparent contractor will readily answer your questions, provide clear explanations, and keep you informed throughout the project. Avoid contractors who seem evasive or unwilling to provide detailed information.
Obtaining and Comparing Multiple Bids
Getting multiple bids from different contractors is essential for ensuring you receive a competitive price and the best value for your investment. Provide each contractor with the same detailed specifications for the project, including the scope of work, materials, and desired timeline. This allows for a fair comparison of their bids. Don’t just focus on the lowest price; carefully review each bid’s breakdown of costs, materials, and labor. Consider the reputation, experience, and communication style of each contractor when comparing bids. A slightly higher bid from a reputable contractor with a strong track record may be a better investment in the long run than a significantly lower bid from a less experienced or less reliable firm. For example, a bid that includes premium-grade materials might be more expensive upfront but offers superior longevity and curb appeal, resulting in long-term cost savings.
Key Elements of a Comprehensive Contract
A well-defined contract protects both you and the contractor. The contract should Articulate the scope of work, including all aspects of the clapboard siding replacement, such as material specifications, demolition, installation, cleanup, and warranty. Payment terms should be explicitly stated, including the schedule of payments and any applicable penalties for late completion. The contract should also specify the project timeline, including start and completion dates, and address potential delays. Crucially, the contract should include a detailed description of the warranty provided by the contractor, covering both materials and workmanship. Consider including clauses addressing potential disputes and outlining the method for resolving them. For instance, a clause specifying arbitration or mediation can streamline the resolution process if disagreements arise. Finally, ensure that both you and the contractor sign and date the contract, signifying mutual agreement and understanding. A sample clause might read: “All disputes arising under this contract shall be resolved through binding arbitration by the rules of the American Arbitration Association.”
Maintenance and Longevity of New Siding: Replacing Clapboard Siding
Source: thisiscarpentry.com
Investing in new clapboard siding is a significant home improvement, and proper maintenance is key to protecting your investment and maximizing its lifespan. Regular care prevents costly repairs and keeps your home looking its best for years to come. Different siding materials require slightly different maintenance routines, but the core principles remain consistent: cleaning, inspection, and prompt repair of any damage.
Proper maintenance significantly extends the life of your clapboard siding, regardless of the material chosen. Neglecting maintenance can lead to premature deterioration, including rot, warping, insect infestation, and fading. A proactive approach, however, ensures your siding remains beautiful and functional for decades. This section Artikels a maintenance schedule and addresses common issues to help you keep your new siding in top condition.
Maintenance Schedules for Different Clapboard Siding Materials
The frequency of maintenance varies depending on the material used for your clapboard siding. Environmental factors, such as harsh weather conditions and proximity to trees or other vegetation, also play a role. The following table provides general guidelines. Remember to adjust the frequency based on your specific location and conditions.
| Siding Material | Annual Maintenance | Every 2-3 Years | Every 5-7 Years |
|---|---|---|---|
| Wood | Cleaning, inspection for damage | Re-staining or painting (if necessary) | Deep cleaning, potential caulking/repair |
| Vinyl | Cleaning with mild detergent and water | Inspection for cracks or damage | Power washing (low pressure) |
| Fiber Cement | Cleaning with mild detergent and water | Inspection for cracks or damage | Deep cleaning, potential caulking/repair |
| Engineered Wood | Cleaning, inspection for damage | Re-staining or painting (if necessary) | Deep cleaning, potential caulking/repair |
Common Issues and Their Solutions
Several common problems can affect new clapboard siding, but most are preventable or easily addressed with timely intervention.
- Water Damage: Proper caulking around windows, doors, and other openings is crucial to prevent water intrusion. Regularly inspect these areas for cracks or gaps and recaulk as needed. Addressing leaks promptly prevents rot and mold.
- Insect Infestation: Wood siding is susceptible to insect damage. Regular inspections can help detect infestations early. Professional pest control may be necessary for severe infestations. For preventative measures, consider using insect-resistant wood treatments.
- Mold and Mildew: Mold and mildew thrive in damp environments. Regular cleaning with a solution of bleach and water can prevent growth. Ensure proper ventilation to keep the siding dry.
- Cracks and Damage: Promptly repair any cracks or damage to prevent further deterioration. Minor repairs can often be done with patching compounds or caulking. Larger repairs may require professional assistance.
- Fading: UV rays from the sun can cause fading, especially in lighter-colored siding. Regular cleaning and, for wood siding, periodic re-staining or painting, can help maintain color vibrancy. Consider using a UV-resistant sealant on wood siding.
Example: Addressing a Water Damage Issue
Imagine a homeowner notices water staining around a window after a heavy rain. This indicates a potential leak. Instead of ignoring it, the homeowner should immediately inspect the caulking around the window frame. If cracks are found, they should be cleaned and recaulked using a high-quality exterior-grade caulk. If the problem persists, they should consult a professional to identify and repair the source of the leak. This proactive approach prevents extensive water damage that could lead to rot and costly repairs.
Visual Examples of Before & After Clapboard Siding Replacements

Source: silvasmith.com
Seeing is believing when it comes to the transformative power of clapboard siding replacement. These examples illustrate the dramatic improvements possible, showcasing different material choices and design aesthetics. Each project highlights the challenges overcome and the resulting aesthetic enhancement.
Example 1: From Dilapidated to Delightful
This project involved a 1950s Cape Cod-style home with severely weathered and damaged cedar clapboard siding. The original siding was showing significant signs of age, including rot, insect damage, and fading paint. The homeowner opted for a durable and low-maintenance vinyl siding in a classic white. The transformation was remarkable. The new siding completely revitalized the home’s exterior, giving it a fresh, clean look. The challenges included removing the old, brittle siding carefully to avoid further damage to the underlying structure. Significant repairs to the sheathing were needed before the new siding could be installed. The final result was a bright, welcoming home that looked decades younger. The crisp white siding complements the home’s architectural details, highlighting its charming features. The visual impact is one of renewed elegance and curb appeal.
Example 2: Modernizing a Victorian
A Victorian-era home with intricate detailing presented a unique set of challenges. The original wood clapboard siding was in fair condition, but the color was outdated and the overall aesthetic felt heavy and dark. The homeowners chose a fiber cement siding in a light gray with a subtle texture. This material offered the durability of wood with less maintenance. The color choice dramatically brightened the home’s exterior, making it feel more spacious and inviting. The challenge lay in matching the intricate trim details with the new siding. Careful planning and precise cutting were crucial to maintaining the home’s historical character. The result is a striking blend of modern aesthetics and Victorian charm. The lighter color and textured siding create a sophisticated and updated look, while still respecting the home’s original design.
Example 3: A Rustic Retreat Reimagined
This project involved a rustic cabin with aged wood clapboard siding that had become dull and gray from years of exposure to the elements. The owners wanted to maintain the home’s rustic charm while enhancing its durability and energy efficiency. They chose a natural-toned cedar clapboard siding, but this time opted for a thicker profile and a slightly wider board width. This created a more contemporary and substantial look. The biggest challenge was sourcing the right type of cedar to match the original character while ensuring sufficient quantities were available. The new siding, with its rich natural tones and slightly larger scale, gave the cabin a more upscale and refined appearance. The visual impact is a striking blend of rustic charm and modern sophistication, showcasing the beauty of natural materials. The slightly wider clapboards add a contemporary twist to the traditional cabin aesthetic, creating a more updated and refined feel without sacrificing the home’s original character.
Building Codes and Permits
Replacing your clapboard siding, while a significant home improvement, necessitates navigating the often complex world of building codes and permits. Understanding these regulations is crucial to ensure your project’s legality and safety, and to avoid potential fines or legal issues. This section Articulates the necessary permits and codes, the process of obtaining them, and the repercussions of neglecting this important step.
Obtaining the necessary permits for clapboard siding replacement involves several key steps and varies depending on your location. Local building departments are the primary source of information for specific requirements in your area. Generally, permits are required for any exterior work that alters the structural integrity or appearance of your home, which typically includes siding replacement. Larger projects, or those involving significant structural changes, may require more extensive permitting.
Permitting Requirements for Clapboard Siding Replacement
The specific permits needed vary significantly by location (city, county, state). Some areas may require a single general building permit, while others might necessitate separate permits for demolition, construction, and potentially even for work related to electrical or plumbing if those systems are affected during the replacement process. Always check with your local building department to ascertain the exact permits required for your specific project. They will provide a detailed list of requirements and applications. It’s advisable to contact them early in the planning stages to avoid delays. Failing to secure the necessary permits before starting work can lead to costly stop-work orders, fines, and even legal action.
The Permit Application Process
The application process usually involves submitting detailed plans of your project, including materials specifications and potential contractor qualifications. These plans need to adhere to local building codes, which dictate everything from the type of materials allowed to the proper installation techniques. You will likely need to provide proof of property ownership, and the application will be reviewed by the building department to ensure compliance. Once approved, the permit will be issued, and you can proceed with the project. The review process can take several days or weeks, depending on the complexity of the project and the workload of the building department.
Consequences of Not Obtaining Necessary Permits
Undertaking a clapboard siding replacement without the required permits can result in several negative consequences. These include significant fines, stop-work orders that halt the project until permits are obtained, and potential legal action from your local authorities. Furthermore, if problems arise during or after the replacement (such as structural issues or code violations), insurance claims may be denied if the work was done without proper permits. The added cost of rectifying unpermitted work can far exceed the cost of obtaining the permits in the first place. For instance, a homeowner in California who completed a significant home renovation without permits faced fines totaling tens of thousands of dollars. This example underscores the importance of compliance. In essence, obtaining the necessary permits is a crucial investment that protects both your investment and your legal standing.
Final Summary

Source: silvasmith.com
Transforming your home’s exterior with new clapboard siding is a rewarding undertaking that combines aesthetics and functionality. By carefully considering material choices, budgeting effectively, and working with reliable contractors, you can achieve a stunning result that enhances your property’s value and beauty for years to come. Remember to prioritize proper maintenance to ensure the longevity of your investment. This guide has equipped you with the essential information to navigate this project confidently and successfully.
Query Resolution
How long does it typically take to replace clapboard siding?
The timeframe varies greatly depending on the size of the house, the complexity of the job, and weather conditions. Expect anywhere from a few days to several weeks for a complete replacement.
Can I replace the clapboard siding myself?
While possible for smaller projects or those with significant DIY experience, replacing clapboard siding is a labor-intensive and potentially dangerous task. Hiring professionals is often recommended, especially for larger homes.
What is the best time of year to replace clapboard siding?
Spring and fall generally offer ideal weather conditions for exterior home projects. Avoid extreme heat or cold for optimal results and worker safety.
What should I do about damaged underlying sheathing?
Any damaged sheathing must be repaired or replaced before installing new siding. Ignoring this crucial step will compromise the longevity and integrity of your new siding.
How do I dispose of old clapboard siding responsibly?
Check with your local waste management authority for guidelines on disposing of old siding. Some materials may require special handling or recycling options.
Comments are closed.