Hardie Installers Your Guide to Expert Installation

Hardie installers are skilled professionals specializing in the installation of James Hardie fiber cement siding, a popular choice for its durability and aesthetic appeal. This guide provides a comprehensive overview of finding qualified installers, understanding the installation process, budgeting for the project, and maintaining your Hardie siding for years to come. We’ll cover everything from choosing the right installer and understanding different Hardie products to managing costs and ensuring your warranty is protected.
Whether you’re a homeowner embarking on a renovation or a contractor looking to expand your skills, this guide offers practical advice and valuable insights to navigate the world of Hardie siding installation successfully. We’ll delve into the intricacies of different Hardie products, installation techniques, and cost considerations, equipping you with the knowledge to make informed decisions throughout the entire process.
Finding Hardie Installer Professionals
Finding the right installer is crucial for a successful Hardie siding project. Choosing a qualified professional ensures the job is done correctly, efficiently, and to the highest standards, protecting your investment and enhancing your home’s curb appeal. This section will guide you through the process of locating, vetting, and selecting a reputable Hardie installer.
Locating Qualified Hardie Installers
Several resources can help you find qualified Hardie installers in your area. Utilizing a combination of these methods increases your chances of finding a suitable professional.
- James Hardie’s Website: James Hardie, the manufacturer of Hardie siding, often provides a “Find a Contractor” tool on their website. This tool allows you to search for certified installers in your region.
- Online Directories: Websites like Angi, HomeAdvisor, and Yelp contain listings for home improvement contractors, including many specializing in Hardie siding installation. Read reviews carefully before contacting any installer.
- Local Building Supply Stores: Lumber yards and home improvement stores frequently work with local contractors and can provide referrals based on their experience and the quality of their work.
- Professional Associations: Check with local chapters of organizations like the National Association of Home Builders (NAHB) or similar associations. These groups often have directories of their members who specialize in exterior home remodeling.
Verifying Installer Credentials and Insurance
Before committing to an installer, it’s vital to verify their qualifications and insurance coverage. This protects you from potential problems and ensures a smooth process.
- Licensing and Certification: Check if the installer holds the necessary licenses and certifications for your area. Contact your local licensing board to confirm the validity of their license.
- Insurance Verification: Request proof of general liability and workers’ compensation insurance. This safeguards you against potential liability for accidents or damages that might occur during the installation process. Confirm that the policies are current and adequate.
- References and Reviews: Request references from previous clients and check online reviews on platforms like Angi, Yelp, and Google My Business. Look for consistent positive feedback and address any negative reviews directly with the installer.
Requesting Quotes and Comparing Bids
Getting multiple quotes is essential for fair pricing and informed decision-making. Ensure all quotes include the same scope of work for accurate comparison.
- Detailed Scope of Work: Provide each installer with a detailed description of the project, including the type of Hardie siding, the area to be covered, and any additional work required (e.g., removal of old siding).
- Itemized Quotes: Request itemized quotes that break down the cost of materials, labor, permits, and any other expenses. This allows for clear comparison and identification of potential overcharges.
- Payment Terms: Clarify payment schedules and methods with each installer. Avoid making large upfront payments; a staggered payment plan based on milestones is often preferable.
- Written Contracts: Always obtain a written contract that Articulates the scope of work, payment terms, warranty information, and project timeline.
Homeowner Checklist for Interviewing Hardie Installers
This checklist helps you systematically evaluate potential installers during your interviews.
| Item | Yes | No | Notes |
|---|---|---|---|
| Proper Licensing and Insurance | |||
| Detailed and Itemized Quote | |||
| Clear Communication and Responsiveness | |||
| Positive References and Reviews | |||
| Experience with Hardie Siding | |||
| Warranty Information | |||
| Project Timeline and Completion Date | |||
| Payment Terms and Schedule |
The Hardie Installation Process
Installing Hardie siding is a significant home improvement project requiring careful planning and execution. Proper installation ensures longevity, weather protection, and the attractive aesthetic Hardie products are known for. This section details the process, product types, and installation methods for successful Hardie siding projects.
Hardie Product Types and Applications
Hardie offers a range of products, each suited to specific applications. Understanding these differences is crucial for selecting the right material for your project. HardiePlank lap siding mimics traditional wood siding, offering a classic look. HardieShingle siding provides a more textured, rustic appearance, ideal for homes seeking a charming, slightly more rugged aesthetic. HardiePanel provides large, flat panels, perfect for modern designs or large expanses of walls. Each product offers varying thicknesses and profiles to further customize the look and durability. For instance, thicker planks provide enhanced protection in harsher climates.
HardiePlank Installation
HardiePlank installation involves several key steps. First, the existing siding must be removed, and the underlying structure inspected and repaired as needed. Next, a water-resistant barrier is installed to prevent moisture damage. Then, furring strips are often attached to create a consistent nailing surface and proper ventilation. Finally, the HardiePlank panels are nailed into place, ensuring proper spacing and alignment. The installation process emphasizes precise measurements and careful nailing to prevent gaps or damage to the siding. Using the correct nails and following manufacturer guidelines is crucial for successful installation and warranty compliance.
HardieShingle Installation
HardieShingle installation differs slightly from HardiePlank. While the initial steps of surface preparation remain similar, the application of the shingles themselves requires a more layered approach. Each shingle is individually nailed, overlapping the previous row to create a weathertight seal. This method demands careful attention to detail to maintain consistent spacing and a visually appealing, even pattern. The staggered pattern of the shingles contributes to the overall aesthetic and weather resistance.
HardiePanel Installation
HardiePanel installation typically involves larger panels, requiring fewer individual pieces compared to plank or shingle siding. This often translates to a faster installation process. However, precision in measurement and installation is still paramount to ensure proper alignment and a seamless look. Large panels necessitate careful handling to avoid damage during installation. The installation process usually involves using specialized fasteners and paying close attention to the panel’s alignment with adjacent elements of the house’s exterior.
Preparing a Home for Hardie Siding Installation, Hardie installers
Preparing the home’s surface is a critical first step. This includes removing existing siding, repairing any underlying damage to sheathing or framing, and ensuring a clean, dry surface. Necessary materials include: Hardie siding, appropriate nails, caulk, flashing, underlayment, furring strips (if needed), and safety equipment. A thorough inspection of the house’s exterior is essential to identify and address any potential issues before installation begins. Addressing these issues upfront can prevent problems later and ensure a successful and long-lasting installation.
Costs and Budgeting for Hardie Installation
Planning a Hardie siding installation requires careful consideration of the associated costs. Understanding the various factors influencing the final price will help you create a realistic budget and avoid unexpected expenses. This section breaks down the typical costs, provides a sample budget template, and explores payment options.
Typical Costs Associated with Hardie Siding Installation
The cost of Hardie siding installation is influenced by several key factors, resulting in a wide range of potential expenses. A typical project includes costs for materials, labor, and permits. Material costs depend on the chosen siding type, color, and quantity needed. Labor costs vary based on the complexity of the project, the installer’s experience, and regional labor rates. Permitting fees are determined by local regulations and the project’s scope.
Factors Influencing Overall Cost
Several factors significantly impact the final cost of a Hardie siding project. These include the size of the house, the complexity of the installation (e.g., intricate trim work, multiple siding types), the existing condition of the house (requiring additional preparation work), the chosen siding type and color (some options are more expensive), the geographic location (labor and material costs vary regionally), and the contractor’s experience and reputation (more experienced installers may charge higher rates). For example, a large, multi-story home with complex architectural details will naturally cost more than a smaller, simpler home. Similarly, choosing a premium color or a more intricate siding profile will increase the overall material cost.
Sample Budget Template for Hardie Siding Installation
Creating a detailed budget is crucial for managing your project effectively. The following template provides a framework:
| Item | Estimated Cost |
|---|---|
| Materials (Siding, Trim, Fasteners, etc.) | $[Amount] |
| Labor (Installation, Preparation, Cleanup) | $[Amount] |
| Permits and Inspections | $[Amount] |
| Contingency (Unexpected Expenses) | $[Amount] (typically 10-15% of total estimated cost) |
| Total Estimated Cost | $[Amount] |
Remember to obtain multiple quotes from reputable installers to compare pricing and ensure you’re getting a fair price. It is advisable to add a contingency buffer to account for unforeseen circumstances. For example, if the total estimated cost is $10,000, a 10% contingency would add $1,000 to the budget, bringing the total to $11,000.
Payment Options and Financing Possibilities
Most contractors offer various payment options, including upfront payments, staged payments based on project milestones (e.g., material delivery, completion of specific phases), and final payment upon project completion. Financing options may include home equity loans, personal loans, or contractor financing programs. Always clarify payment terms and deadlines with your chosen contractor before starting the project. Carefully review any financing agreements to understand interest rates, repayment schedules, and any associated fees. For instance, a contractor might require 50% upfront, 25% upon completion of the framing, and the remaining 25% upon final inspection. Alternatively, a homeowner could explore financing options through their bank or a credit union.
Maintenance and Care of Hardie Siding
Proper maintenance is key to extending the life and preserving the beauty of your Hardie siding. Regular cleaning and occasional inspections will help prevent damage and ensure your investment remains protected for years to come. Neglecting maintenance can lead to costly repairs down the line.
Recommended Maintenance Procedures
A simple yearly inspection and cleaning will go a long way in maintaining your Hardie siding. More intensive cleaning may be needed depending on your location and environmental factors. For example, coastal areas may require more frequent cleaning due to salt spray.
- Annual Inspection: Visually inspect the siding for any signs of damage, such as cracks, loose pieces, or discoloration. Pay close attention to areas prone to impact, like corners and around windows and doors.
- Cleaning: Wash the siding with a garden hose and a soft-bristled brush. For stubborn stains, use a mild detergent solution. Avoid using high-pressure washers, as these can damage the siding’s surface.
- Caulk Repair: Inspect and repair any damaged caulking around windows, doors, and other openings. Use a high-quality exterior-grade caulk designed for use with fiber cement siding.
- Paint Touch-Ups (if applicable): If your Hardie siding is painted, touch up any chips or scratches promptly to prevent rust or further damage. Use a high-quality exterior paint that is compatible with fiber cement.
Common Problems and Solutions
While Hardie siding is durable, some issues can arise. Addressing these promptly can prevent minor problems from becoming major headaches.
- Cracks: Small cracks can often be repaired with a patching compound specifically designed for fiber cement. Larger cracks may require professional attention.
- Loose or Damaged Pieces: If a piece of siding becomes loose or damaged, it’s best to replace it. This is a job best left to professionals unless you have experience with siding installation.
- Mold or Mildew: In humid climates, mold or mildew can grow on the siding. Clean it with a solution of bleach and water (follow the manufacturer’s instructions carefully), and ensure proper ventilation to prevent recurrence.
- Water Damage: Ensure proper drainage around the foundation and gutters are clear to prevent water damage. Water intrusion can lead to rot and other issues.
Cleaning and Protection from the Elements
Protecting your Hardie siding from the elements is crucial for longevity. Regular cleaning and preventative measures will help maintain its appearance and structural integrity.
For regular cleaning, a simple solution of mild detergent and water, applied with a soft-bristled brush, is usually sufficient. Rinse thoroughly with a garden hose. Avoid abrasive cleaners or harsh chemicals that can damage the surface. For stubborn stains, consider a specialized siding cleaner following the manufacturer’s instructions carefully. In coastal areas, consider more frequent cleaning to remove salt deposits that can accelerate deterioration.
Regular Maintenance Schedule
Establishing a regular maintenance schedule will help you stay on top of potential problems and ensure your Hardie siding remains in excellent condition for years to come.
| Task | Frequency |
|---|---|
| Visual Inspection | Annually |
| Cleaning | Annually (more frequently in coastal areas) |
| Caulk Inspection and Repair | Annually |
| Paint Touch-Ups (if applicable) | As needed |
Warranty and Guarantees for Hardie Products
Source: allstarwindowsiding.com
James Hardie offers warranties on its products to protect homeowners from defects in materials and workmanship. Understanding these warranties is crucial for ensuring your investment is protected. This section details the warranty process, what it covers, and circumstances that could invalidate your coverage.
James Hardie provides a 30-year non-prorated warranty on most of its fiber cement siding products against manufacturing defects. This means that if a defect arises due to faulty manufacturing within 30 years, James Hardie will cover the cost of repair or replacement, without any depreciation deduction. This warranty is typically transferable to subsequent homeowners, providing long-term protection for the property.
The Warranty Claim Process
Filing a warranty claim requires documenting the defect and contacting James Hardie directly. Typically, this involves submitting photos and detailed descriptions of the damage, along with proof of purchase and installation. James Hardie will then review the claim and, if approved, work with you or your installer to arrange for the necessary repairs or replacements. The specific steps may vary slightly depending on the product and the nature of the defect but generally involve clear communication and documentation.
Factors that May Void the Hardie Warranty
Several factors can void or limit the warranty coverage. These include improper installation, damage caused by misuse or neglect, and alterations made to the product without James Hardie’s authorization. For example, damage from severe weather events may be covered, but only if the installation mmeetsthe manufacturer’s specifications. Damage caused by improper cleaning or maintenance, such as using abrasive cleaners, will typically not be covered. Similarly, attempts to repair the siding yourself without professional assistance could also void the warranty. It’s vital to follow all installation and maintenance instructions provided by James Hardie to ensure warranty validity.
Comparison of Warranty Coverage Across Hardie Products
While the core 30-year non-prorated warranty applies to many James Hardie products, specific terms and conditions might vary slightly depending on the product line. For instance, some specialized products or finishes may have different warranty periods or specific exclusions. It’s essential to consult the specific warranty documentation provided with your purchased product to understand the exact terms and conditions applicable to your siding. This information is usually available on the James Hardie website or within the product packaging. Always refer to the specific warranty document for your product for the most accurate and up-to-date information.
Illustrative Examples of Hardie Siding Installations: Hardie Installers

Source: innovativeroofs.com
This section presents three diverse Hardie siding projects, highlighting the versatility and durability of Hardie products in various architectural styles and environmental conditions. Each example details the materials used, the challenges encountered during installation, and the final aesthetic and functional outcomes.
Hardie Siding on a Victorian-Style Home
This project involved the complete re-siding of a large Victorian home located in a coastal area. The original wood siding was severely weathered and damaged by salt spray. The homeowner chose HardiePlank® lap siding in a deep, charcoal gray color to complement the home’s intricate trim work. The installation presented challenges due to the home’s complex gables, numerous windows, and decorative features. Careful measurement and precise cutting were essential to ensure a seamless fit. The final result was a stunning transformation, showcasing the elegance of the home’s architecture while providing superior protection from the elements. The deep gray siding created a striking contrast against the white trim, highlighting the home’s architectural details. The HardiePlank’s durability ensured long-lasting protection against the harsh coastal environment.
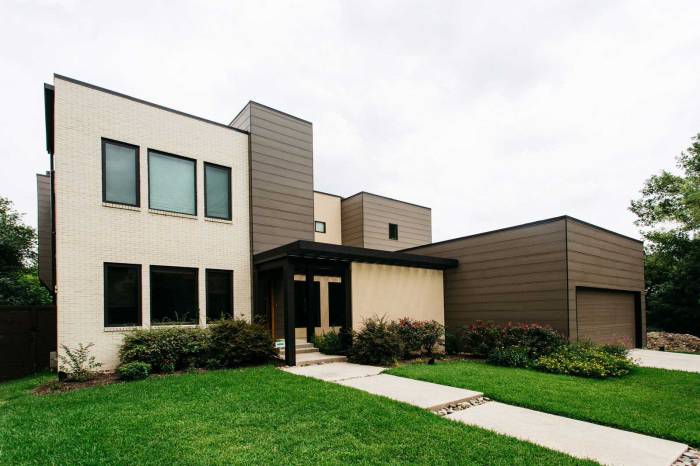
Hardie Panel Siding on a Modern Farmhouse
A modern farmhouse, situated in a rural setting, benefited from the clean lines and rustic charm of HardiePanel® vertical siding. The homeowner opted for a warm, light gray color to complement the home’s natural surroundings. The relatively straightforward design of the home simplified the installation process. However, the large expanses of siding required careful planning and efficient execution to ensure a consistent appearance. The use of HardiePanel siding allowed for a contemporary aesthetic while maintaining a rustic feel, perfectly complementing the farmhouse style. The light gray color provided a neutral backdrop that allowed the home’s other architectural features to stand out. The project demonstrated the ease of installation and the clean, modern aesthetic that HardiePanel siding can achieve.
Hardie Shingle Siding on a Craftsman Bungalow
A Craftsman-style bungalow underwent a siding upgrade using HardieShingle® siding to capture the texture and character of traditional wood shingles without maintenance. The homeowner selected a warm, earthy brown tone to enhance the home’s cozy and inviting feel. A challenge presented itself in matching the shingle pattern and color to the existing roof tiles. Careful color selection and meticulous installation were crucial to achieve a harmonious blend between the siding and the roof. The final product created a beautifully textured and visually appealing exterior. The HardieShingle siding replicated the look of traditional wood shingles but offered superior durability and weather resistance. The warm brown color enhanced the home’s charm and complemented the natural surroundings.
Comparing Hardie Siding to Other Siding Options
Source: multiscreensite.com
Choosing the right siding for your home is a significant decision impacting both aesthetics and long-term costs. This section compares James Hardie fiber cement siding with popular alternatives, helping you make an informed choice. We’ll examine cost, maintenance needs, and durability to highlight the key differences.
Siding Material Comparison
The following table provides a direct comparison of Hardie siding against vinyl, wood, and other fiber cement options. Remember that actual costs can vary based on location, labor rates, and specific product choices. Maintenance requirements also depend on climate and homeowner diligence.
| Material | Cost (Relative) | Maintenance | Durability |
|---|---|---|---|
| James Hardie Fiber Cement | High | Moderate (periodic cleaning, repainting) | Very High (resistant to fire, rot, insects) |
| Vinyl Siding | Low to Moderate | Low (occasional cleaning) | Moderate (prone to damage from impact, extreme temperatures) |
| Wood Siding | Moderate to High | High (regular painting, staining, potential repairs) | Moderate (susceptible to rot, insect infestation, fire) |
| Other Fiber Cement Siding | High | Moderate (similar to Hardie) | High (varies depending on the manufacturer and specific product) |
Advantages and Disadvantages of Each Siding Material
Understanding the strengths and weaknesses of each material is crucial for making the best decision for your home.
James Hardie Fiber Cement: Advantages include superior durability, fire resistance, and pest resistance. Disadvantages include higher initial costs and the need for professional installation. It may also require repainting over time, although less frequently than wood.
Vinyl Siding: Advantages include low cost and low maintenance. Disadvantages include susceptibility to damage from impact and extreme temperatures, a less natural appearance compared to wood or fiber cement, and the potential for fading over time. It also lacks the fire resistance of Hardie siding.
Wood Siding: Advantages include a natural aesthetic appeal. Disadvantages include high maintenance requirements (regular painting, staining), susceptibility to rot, insect infestation, and fire. It is also generally more expensive than vinyl siding.
Other Fiber Cement Siding: Advantages are similar to James Hardie, offering high durability and resistance to the elements. Disadvantages also mirror Hardie, with higher initial cost and potential for needing repainting. However, quality and performance can vary significantly between manufacturers, so careful research is essential.
Last Recap
Choosing the right Hardie installers and understanding the process from start to finish is crucial for a successful project. By following the tips and advice Artikel in this guide, you can ensure your Hardie siding installation is not only aesthetically pleasing but also durable and long-lasting. Remember to always prioritize qualified installers, carefully review contracts, and maintain your siding according to manufacturer recommendations. With careful planning and the right professional, your new Hardie siding will enhance your home’s beauty and value for years to come.
FAQ Section
What is the average lifespan of Hardie siding?
With proper maintenance, Hardie siding can last 30-50 years or more.
Do I need a permit for Hardie siding installation?
Permits are usually required; check with your local building department.
Can I install Hardie siding myself?
While possible, it’s generally recommended to hire professionals for aroper installation and warranty coverage.
How do I clean Hardie’s siding?
Regularly wash with water and a mild detergent; avoid pressure washing.
What should I look for in a Hardie installer’s insurance?
Verify they have general liability and workers’ compensation insurance.
What are the common causes of Hardie siding damage?
Improper installation, impact damage, and extreme weather can cause damage.
Comments are closed.